
Earlier this morning, I joined a free workout class from my bedroom.
I placed weights and a yoga mat beside my bed, and took the class in real-time with 6,000 of my closest friends.
You might be thinking I took the class on Peloton's website, or through another boutique fitness studio.
In reality, I actually took the class on Instagram — and, more specifically, Instagram Live.
There are plenty of benefits for businesses to post Live videos on Instagram. For one, people love watching live videos. The content can feel more authentic and natural than it would if it had been pre-recorded — just consider how addicting Saturday Night Live can be, particularly if the actors make mistakes or break character.
Additionally, 82% of people prefer live video from a brand over standard social media posts.
You might consider using Instagram's Live feature to host live Q&A's with industry leaders, stream entire virtual events, or host live product tutorials from social media influencers.
If you've never posted a live video on Instagram, you're in luck. Here, we'll dive into how you can go live on Instagram in five easy steps. (By the way, I'm no Instagram influencer, so please excuse the sad plant as my only willing Live video subject.)
How to Go Live on Instagram
It's important to note — these instructions will only work if you're opening the Instagram app on mobile. However, if you'd prefer to create a live Instagram video from desktop, you'll need to use a third-party tool like Loola TV.
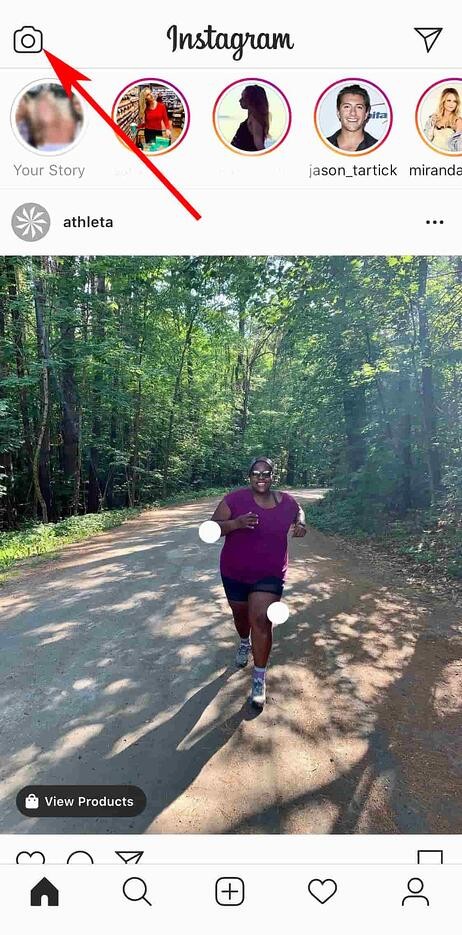
1. First, open your Instagram app on your smartphone, and click the camera icon in the top left corner.
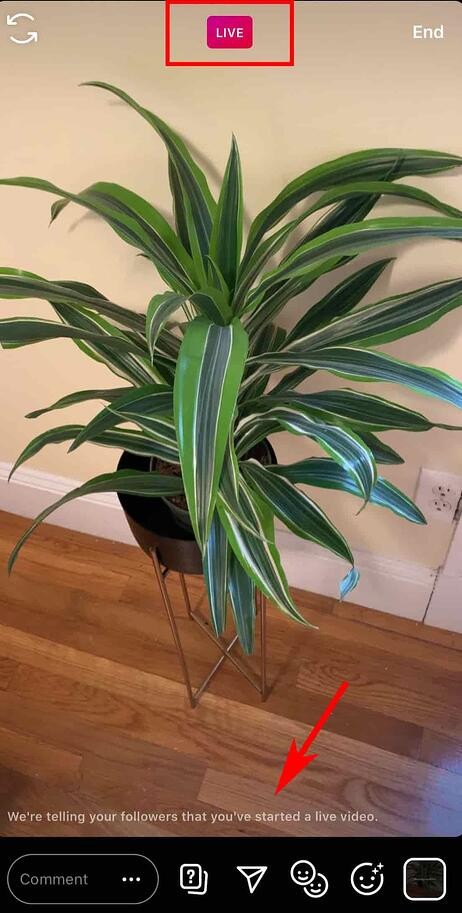
2. On the bottom navigation, scroll all the way to the left until you see "Live". Then, click the big white circle to begin recording. (Note: You'll know you're Live when you see the pink "Live" button at the top of your screen, as well as the text "We're telling your followers that you've started a live video" at the bottom.)

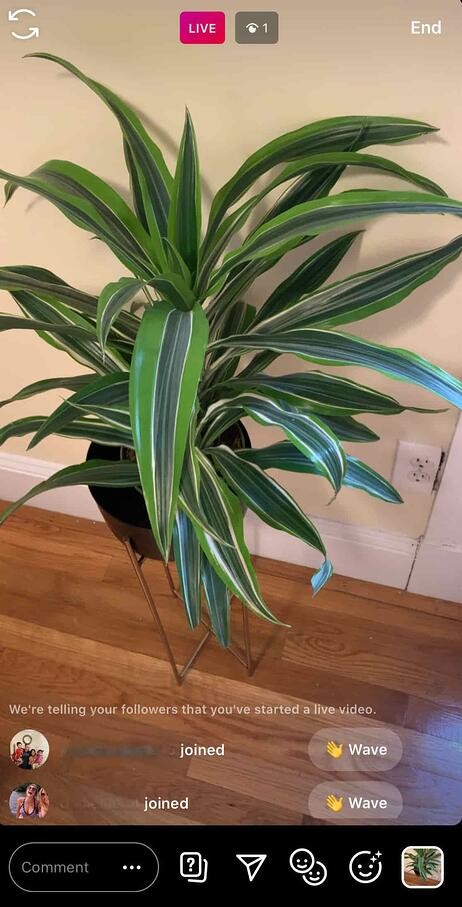
3. When you see accounts begin appearing at the bottom of your screen, you'll know people have begun joining your live video. Feel free to send them a Wave!
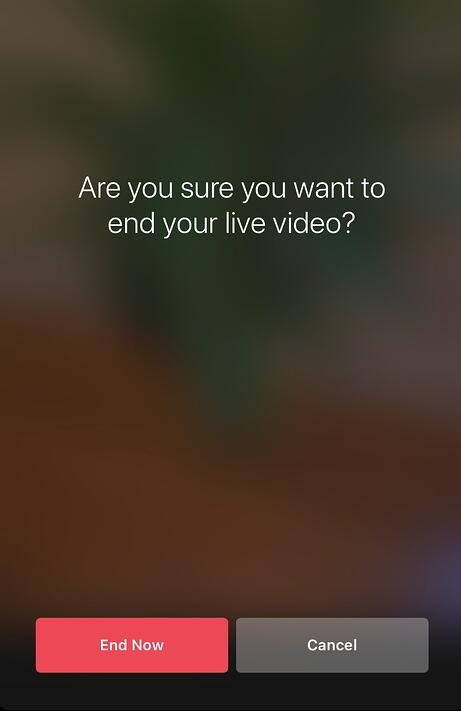
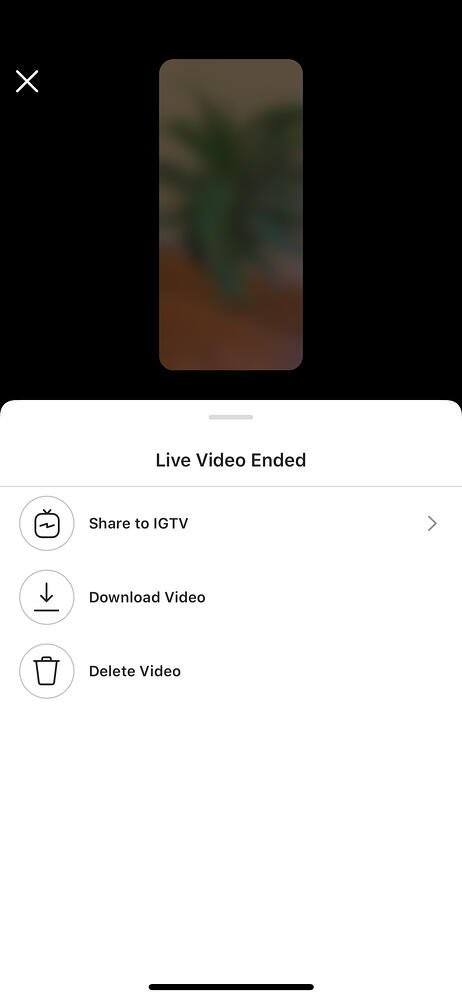
4. When you want to end the video, click "End" at the top right of your screen. When Instagram asks you, "Are you sure you want to end your live video?", click the red "End Now" button.
5. Finally, feel free to share your live video to your IGTV, so followers can still watch the video on your Instagram account after-the-fact. Alternatively, you can download the video to share it on your website or other social media pages, or delete the video.
If you choose to share your live video to your IGTV, your followers can continue watching and re-watching whenever they're available. If you're creating an exclusive membership-only live event, you might want to skip this step, but otherwise, it's a good idea to keep the content you've created to continue boosting awareness for followers who weren't able to join live.
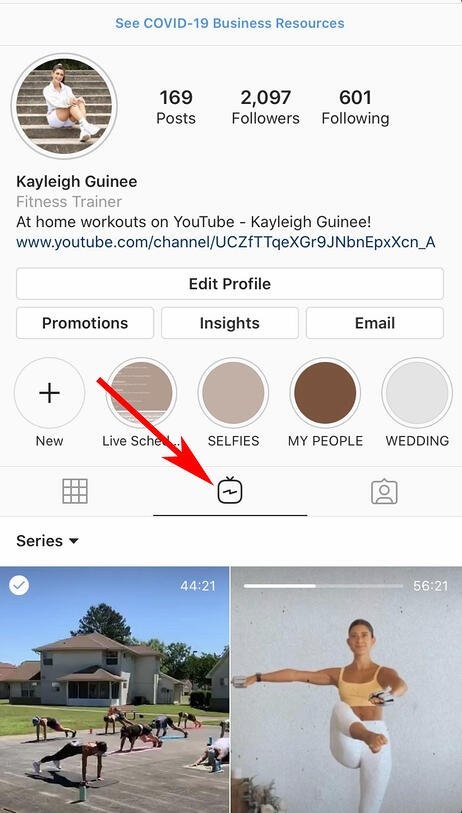
For instance, I regularly partake in fitness trainer Kayleigh Guinee's Instagram Live workout classes, but there are times I'm unavailable for the live version. Fortunately, I know she saves her videos to IGTV, so I'm able to pull up the videos whenever I'm ready to watch:
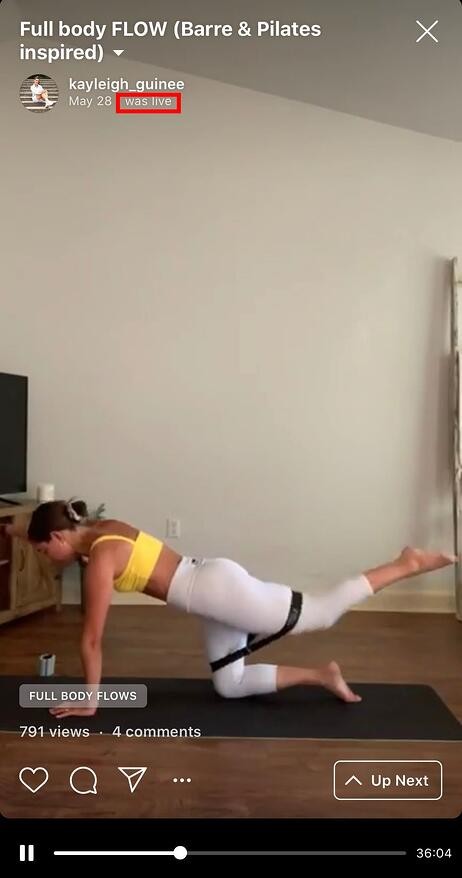
Best of all, I can pause, fast-forward, or replay the live version whenever I need to. You'll know you're watching a previously live Instagram video if you see the small "was live" text in the top left of the screen:
I spoke with Kayleigh to understand why influencers choose live video over other forms of content.
Kayleigh told me, "Online workouts are amazing, but live workouts on Instagram allow my followers to connect with me — and one another — while continuing to build a community, which is more similar to in-person fitness classes."
Kayleigh added, "We're all able to see who joins, chat with each other, and workout in real-time. There is also something about having a time set aside to join a workout that helps us all stay more accountable."
Ultimately, if you're unsure whether Instagram live will work for your brand, you can always give it a try. It's easy, and free, so there's little to lose when experimenting — and potentially a lot to gain.
Finally, there are some great features included in Instagram's Live tool. Let's explore what those are, next.
Instagram Live Features
Once you're rolling with an Instagram Live, you'll see four icons at the bottom of your screen — including a question mark icon, a paper airplane, two smiley-faces, and a filter icon.

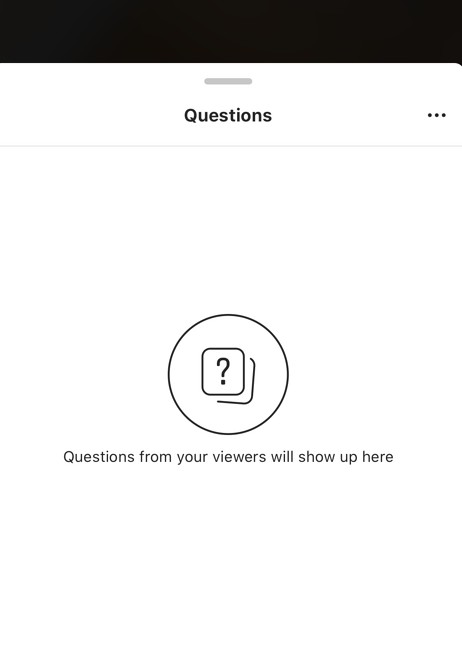
1. The Question Mark Icon lets you share questions from your viewers. (It's important to note, you'll only be able to share questions if someone has submitted a question during your Live video.)
2. The Paper Airplane Icon lets you send a direct message to someone about your Instagram Live video, which you might want to do if you're hoping to invite someone who hasn't yet joined your Live video to watch.
3. The Two Faces Icon lets you invite someone to co-host your Instagram Live. This will help spread your Live video to a bigger audience (including the co-host's followers). You might do this if you're hosting a Q&A with various experts, or partnering with influencers to promote a product.

4. The Filter Icon lets you add filters to your Instagram Live video to make them appear more polished or interesting — like this filter I added to my plant.

Additionally, if you want to turn off commenting, tap the three dots in the "Comment" box, and click "Turn Off Commenting". Alternatively, you can click the three dots if you'd also like to "Turn Off Requests to Go Live" if you don't want other participants asking to co-host.

We'd also recommend hiding offensive comments to ensure followers don't post inappropriate comments during a live video. To do this, go to your Instagram Settings > Privacy > Comments. Then, toggle on "Hide Offensive Comments".
Additionally, you can manually filter to hide certain inappropriate words or phrases you don't want to appear during your live video. Just toggle "Manual Filter" and then type in the phrases you'd like hidden.
And that's it! Hopefully, you'll have your own Instagram Live videos up-and-running in no time. Remember, there's no pressure to make your Live videos perfect. In fact, followers often appreciate when they can see real, authentic, behind-the-scenes footage of your brand.
To learn more about creating top-notch live videos and get inspiration, take a look at Which Types of Live Video Are People Actually Watching? [New Data].