

Forms are often an integral part of a buyer's journey, and most companies already use web forms as part of their marketing strategy.
In fact, 74% of companies use web forms for lead generation, and 49.7% say their online forms are their highest converting lead generation tool.
Forms can vary greatly in purpose -- you might use a form to get more sign-ups to your email newsletter, collect email addresses to send coupons and special offers, create gated content for viewers, or allow leads to sign-up for free versions of your product.
Ultimately, a form is often the fastest and most effective opportunity for you to collect leads and nurture them into sales.
But creating a form can feel like a tricky endeavor, particularly since a form's design can have a major impact on whether a visitor fills it out, or abandons your site altogether.
Here, we're going to dive into how to create your first web form to get you started.
How to Create a Web Form
For our purposes I'm going to show you how to create a form in HubSpot's free form builder, but you could also use Google Forms, WordPress, HTML, or another tool of your choice.
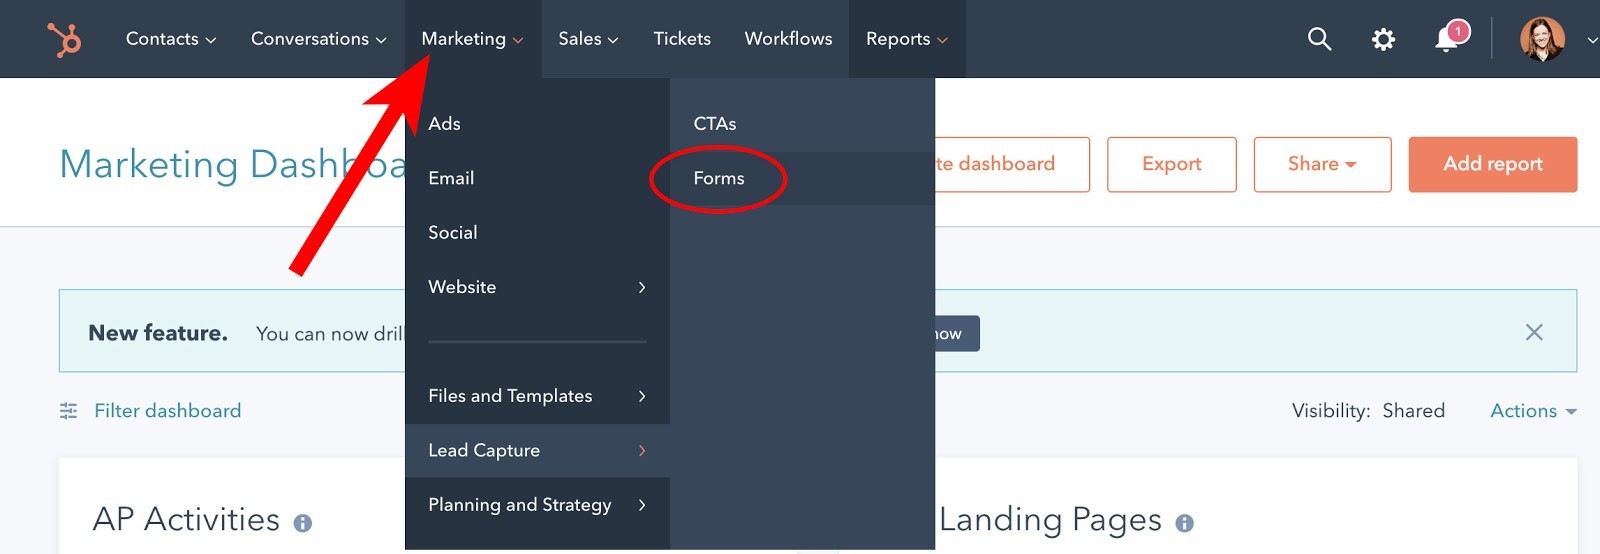
1. To begin creating your form within your HubSpot account, go to "Marketing" > "Lead Capture" > "Forms".
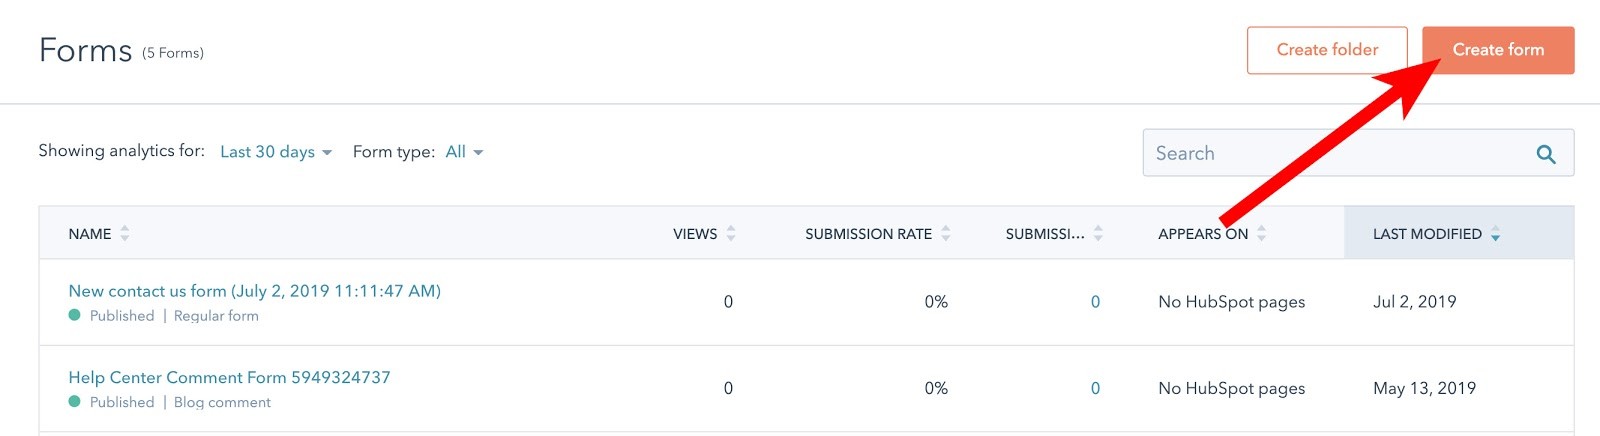
2. In the upper right, click "Create form".
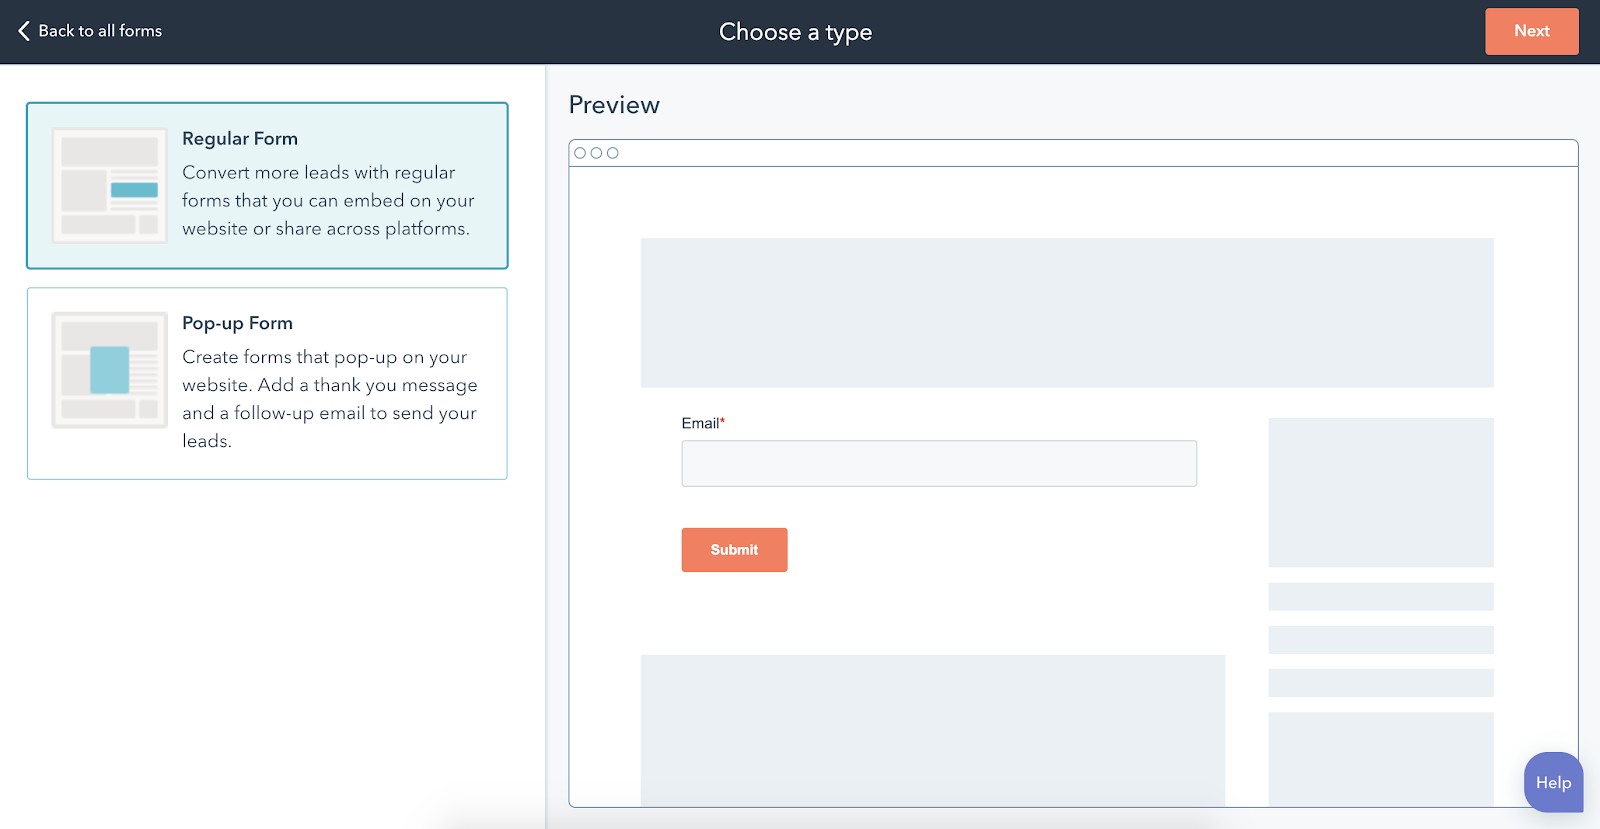
3. In the left panel, click "Regular form". Then click "Next" in the top right.
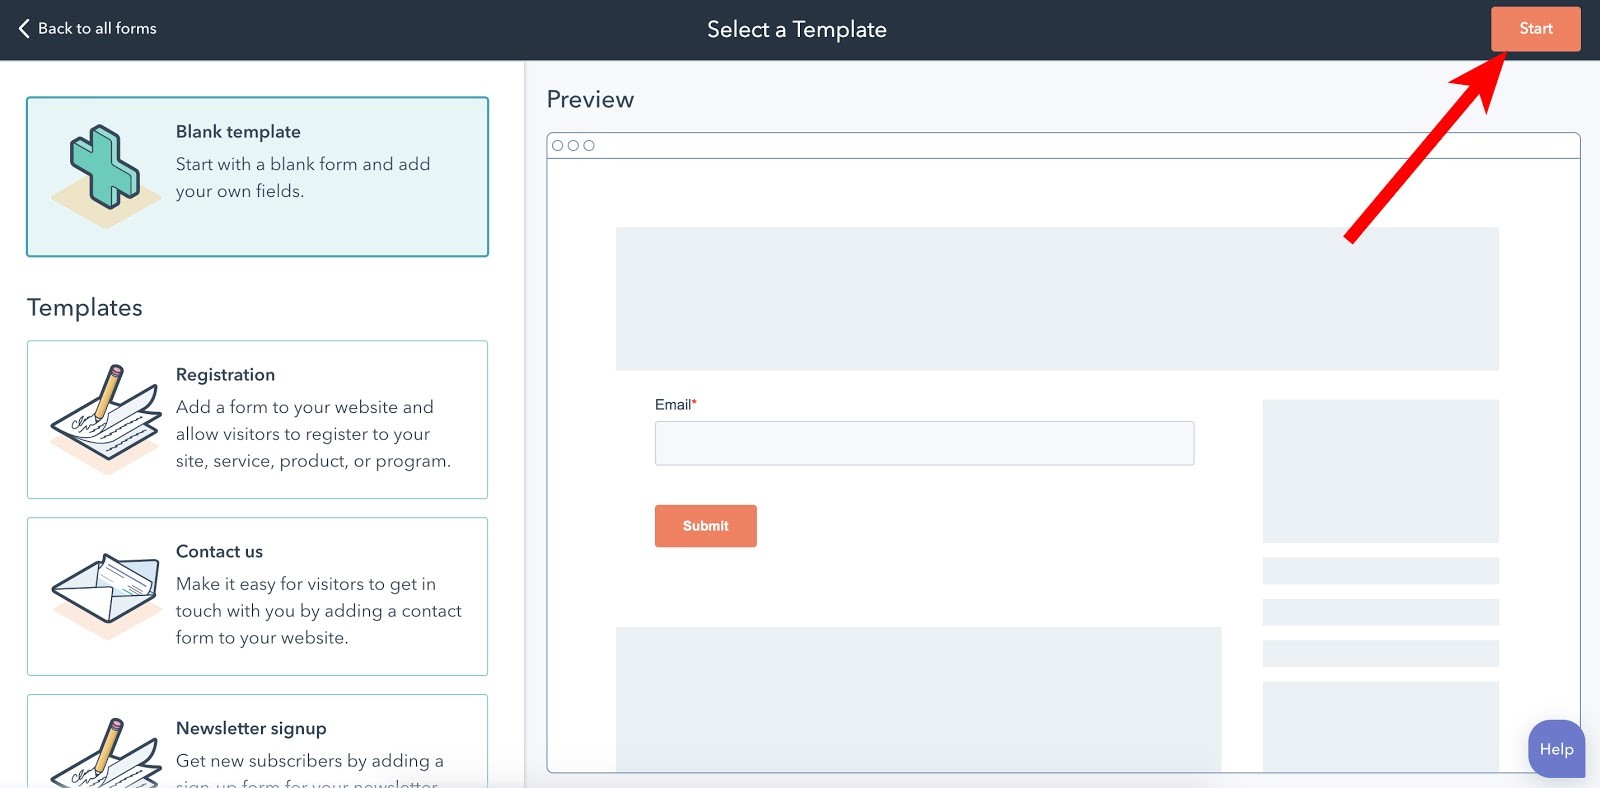
4. Select Blank template to start with a blank form, or a pre-made template for a specific use case. Once you've selected your template, click "Start".
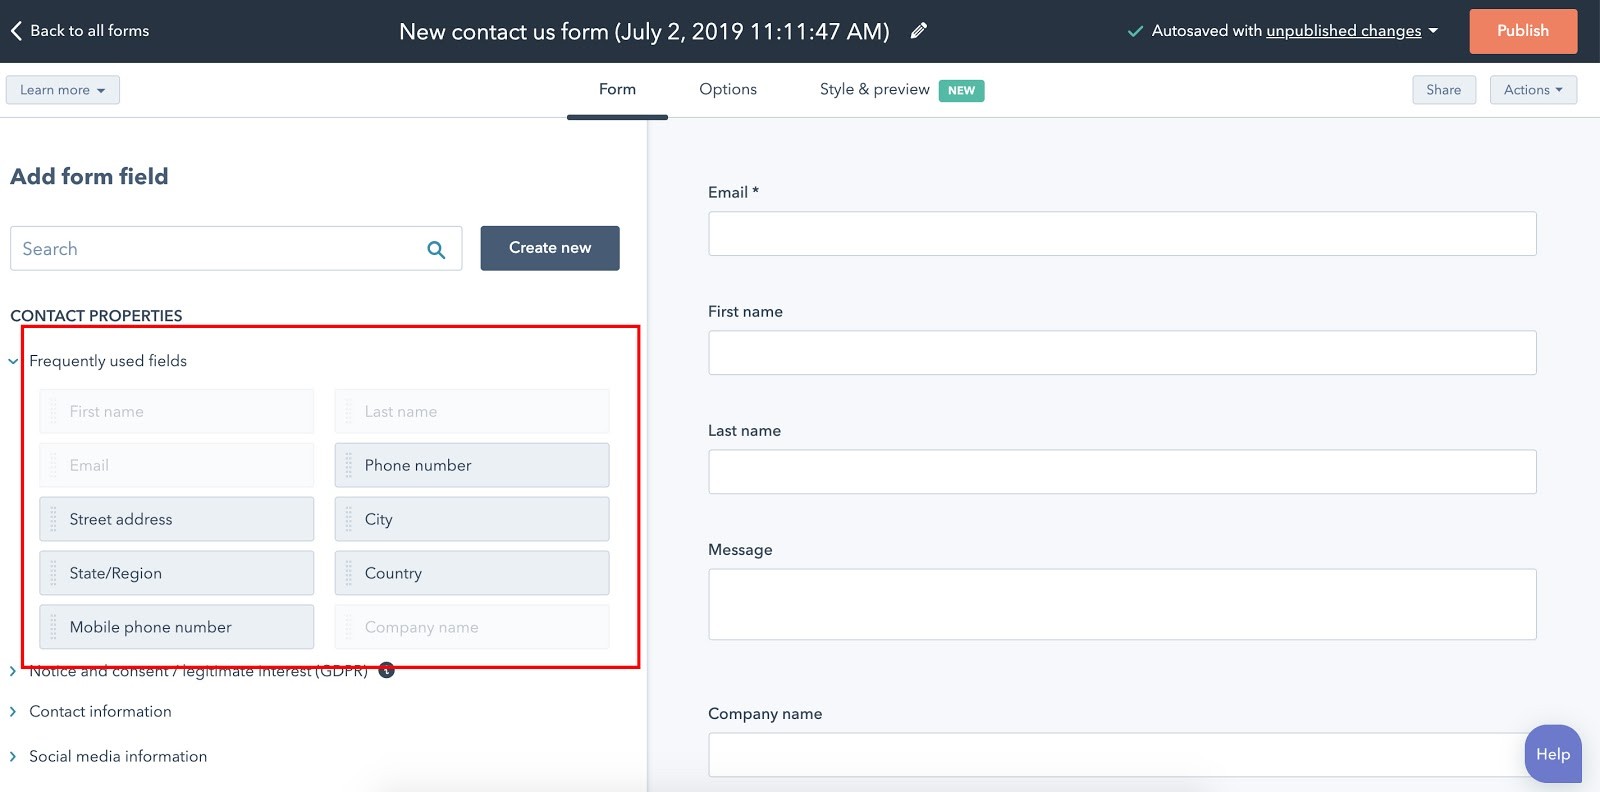
5. Here, you have the option to drag-and-drop any elements on the left side that you'd like in your form. Generally, although not always the case, shorter forms perform better, so try to only ask for the most critical information from your form recipients.
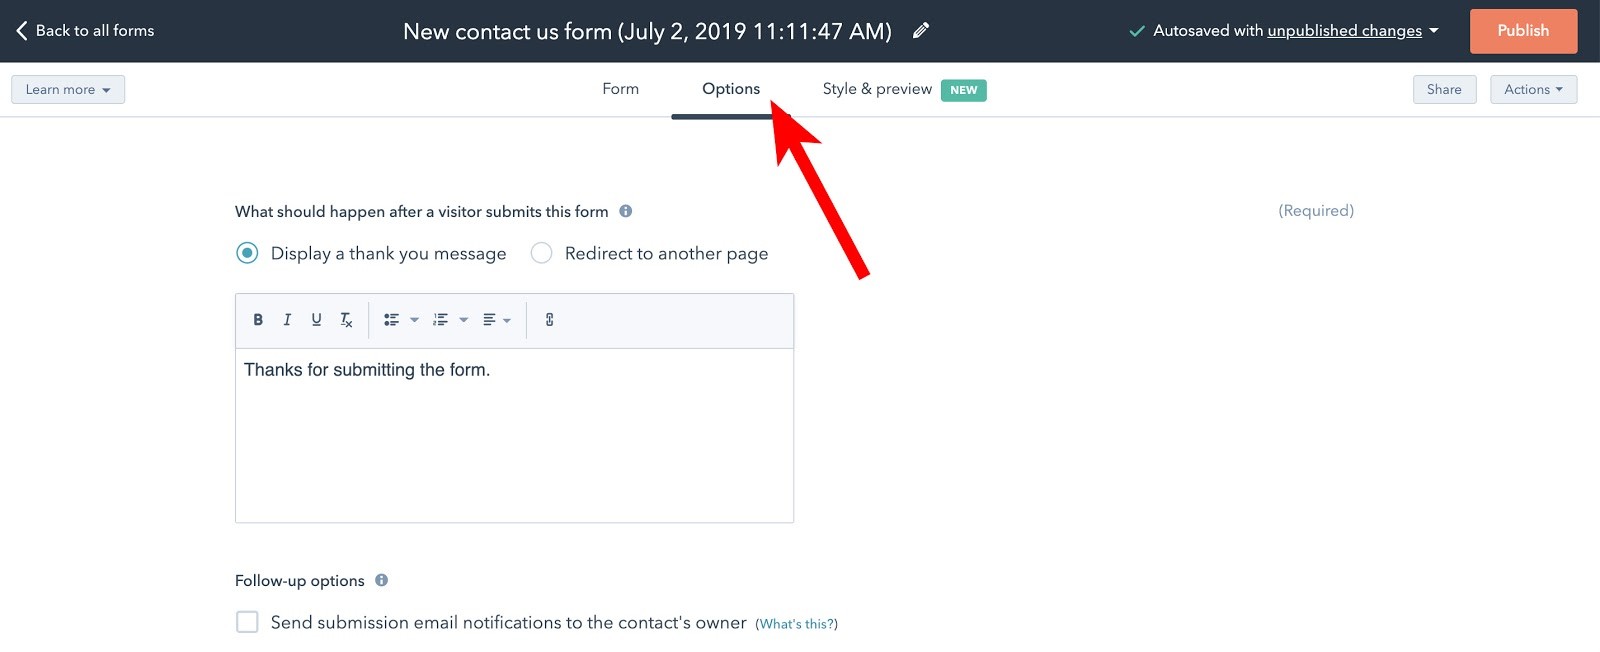
6. Once you've chosen your desired form fields, click "Option" at the top middle of the screen. Here, you can decide what message you want your recipients to see when they complete the form.
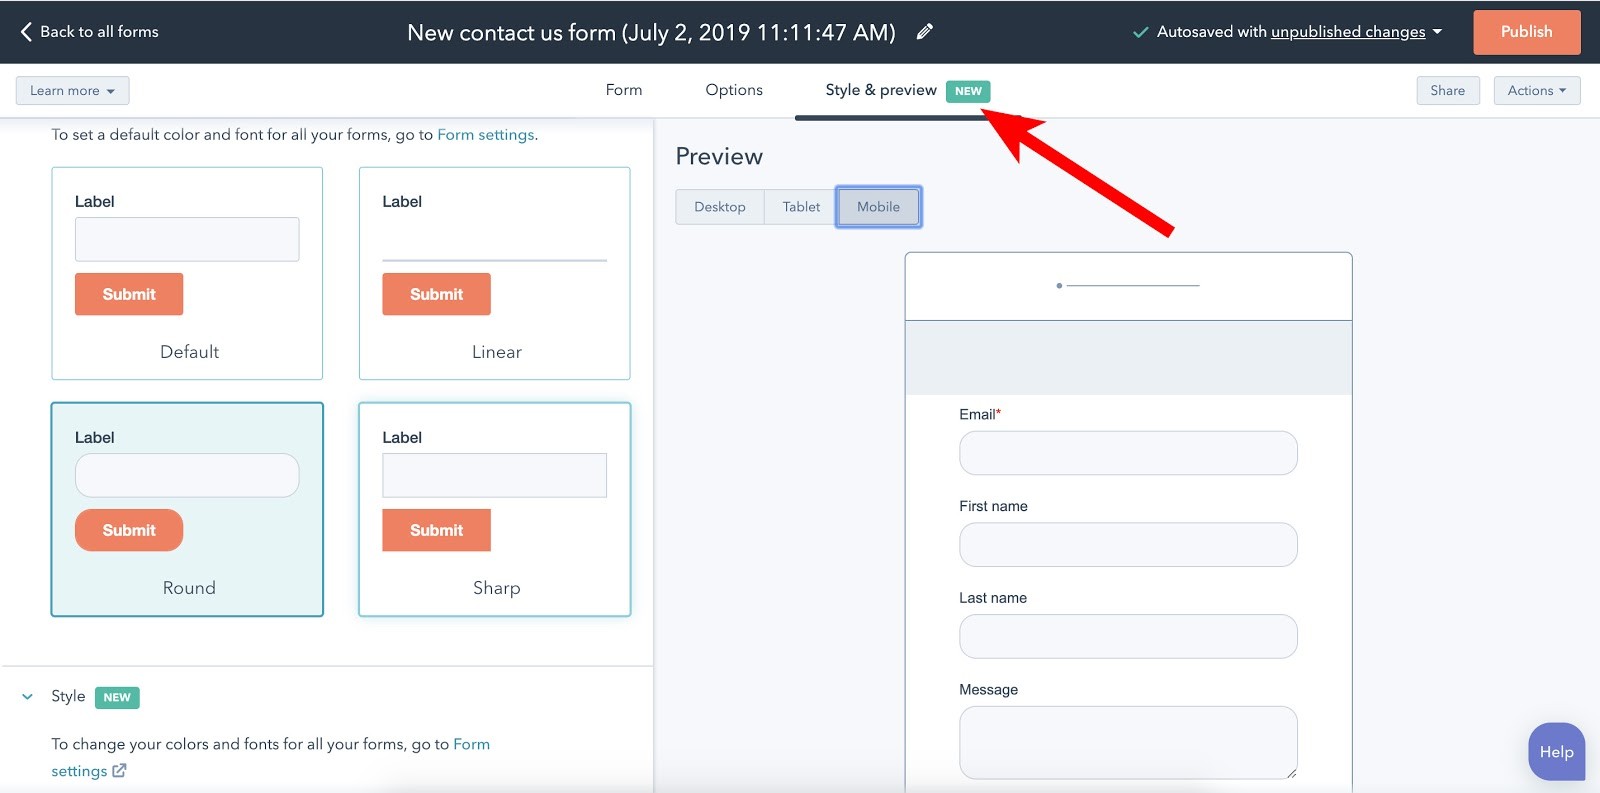
7. Finally, click "Style & preview" at the top right of the screen to preview how your form will look on desktop, tablet, and mobile. Additionally, you can make some changes here to the style of your form -- for instance, choosing a round or sharp-edged "Submit" button, or changing the colors and fonts of your form.
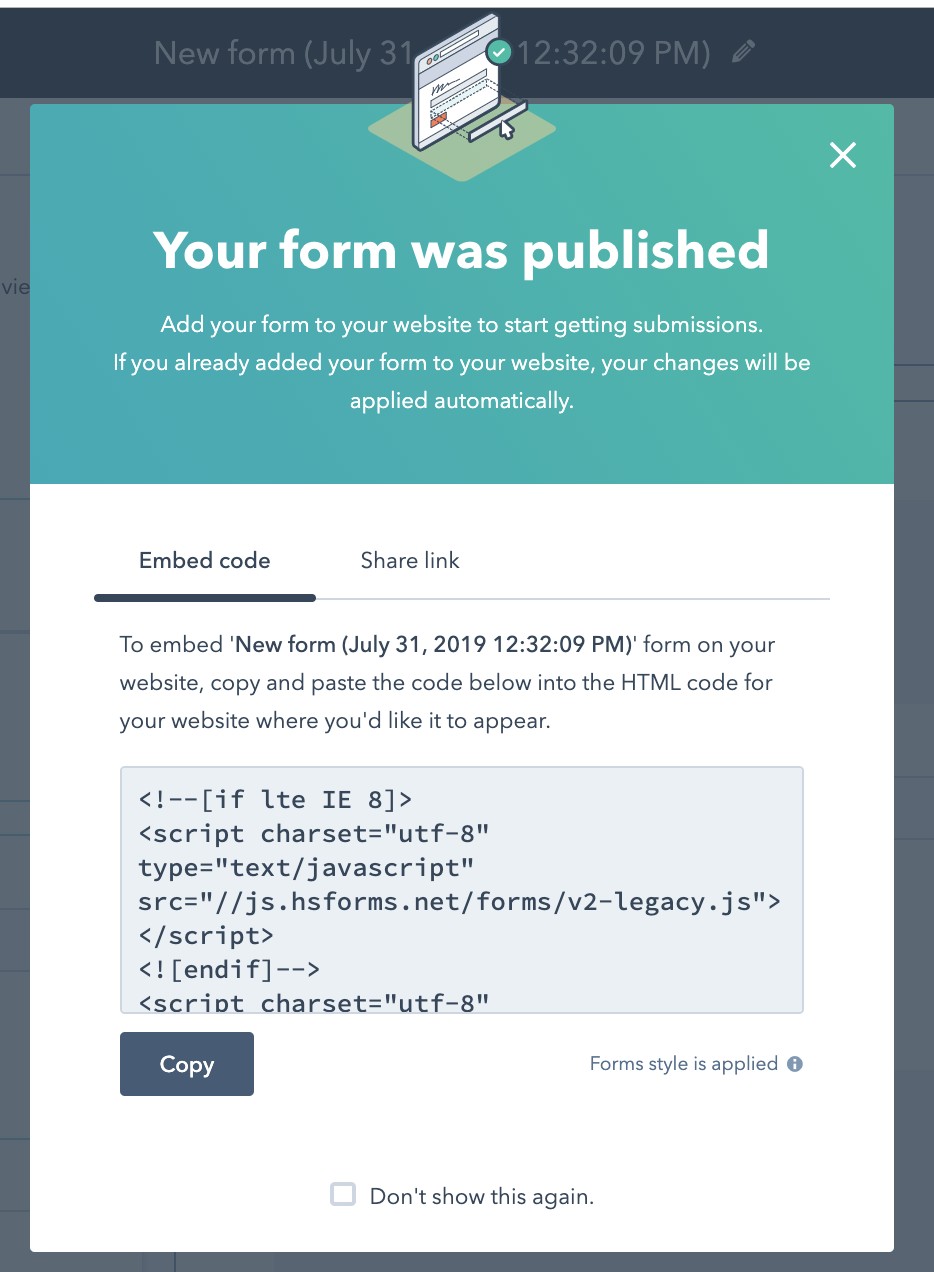
When you're ready, click "Publish" at the top right of your screen.
8. Once you click "Publish", you'll see this pop-up. Copy and paste the code into your website to embed the form onto one of your web pages, or share the link with recipients via email.
While we created this form using HubSpot's free online form builder, there are other form building tools at your disposal -- take a look at 21 of the Best Form Builder Tools for 2019 for a complete list.
Additionally, check out Form Design Best Practices: 15 Tips to Boost Conversions and UX to ensure your form is ready for optimal conversions.